What you will need:
Large tag punch
Two shades of card ( I used apricot appeal and blush blossom)
Clear Versamark ink pad
Gold embossing powder
Heat gun
Simply Said stamp set
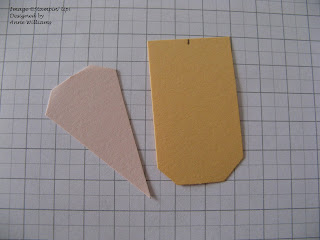
First cut your card into 3cm wide strips. Then thread them through the tag punch, punching one end.
These need to be trimmed to 5cm long. Then mark the centre of the 3cm side and cut diagonally from the mark to the corner at the other end of the strip.
After that using the multi-flower stamp from the Simply Said set, randomly stamp each piece using the Versamark and emboss with gold embossing powder.
Stick the first piece in postion using only the sticky pad. Line the second piece up to it.
Then holding down the centre points, slide the second piece so that it just overlaps the first, sticking down with the sticky pad only again.
Repeat until all the pieces are in place.
I then stamped and embossed the 2 step flower from the Simply Said set, using apricot appeal for the first step and glued it in place over the points of the fan. The glue also serves to hold the fan points in place. Finish by adding a flat back pearl to the centre of the flower.
Then mount and complete the card as desired. I used the sentiment from the Simply Said set too.
Hope this all makes sense. Please let me know if it doesn't!


3 comments:
Makes perfect sense to me Ann! Very elegant indeed :o)
Really cute project - I love it! And very clear instructions too. I will be telling my customers where to find you!
Lovely delicate fan and perfect instructions for it. Well done on your first tut. Hugs Monica xx
Post a Comment